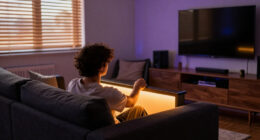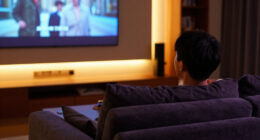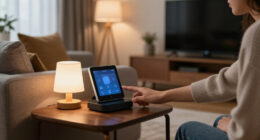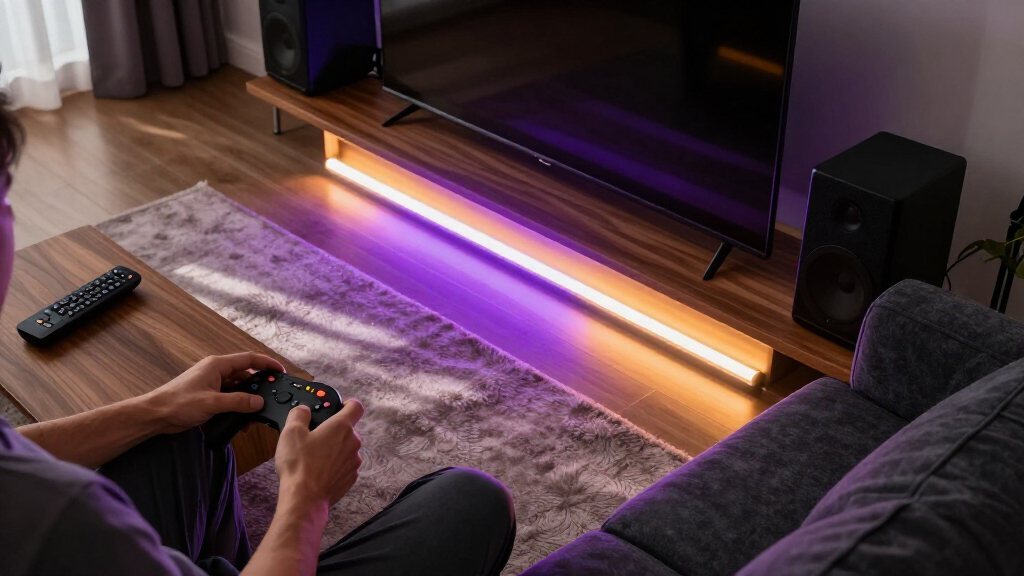
Set up spooky ambient lighting for a media room by combining dim, indirect light, a restrained color palette, and controls you can adjust from your seat. This guide is for beginners who want a Halloween-ready or horror-movie atmosphere without glare, distracting flicker, or unsafe cables. Plan for about 45-90 minutes, depending on how many lights you install and whether you need to pair smart bulbs or controllers.

Get your home office setup delivered free — and shop member deals
- Fast, free delivery on millions of items
- Access to Prime Big Deal Days deals on October 6–7
- Prime Video, Amazon Music and more included

JMEXSUSS 100 LED Orange and Purple Halloween Fairy Lights, USB Powered
- ✔ LED count: 100
- ✔ Length: 33 feet
- ✔ Light colors: Orange and purple
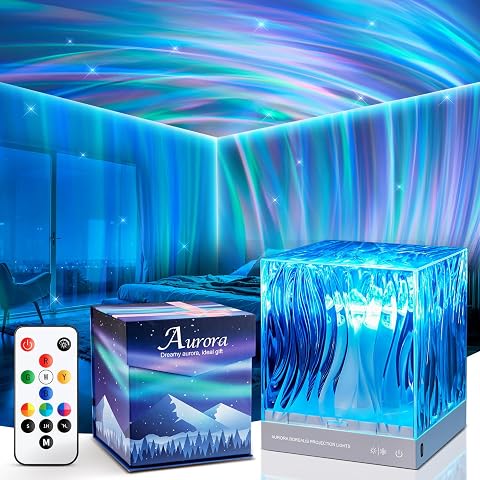
18-Color Northern Lights Galaxy Projector Night Light
- ✔ Colors: 18
- ✔ Lighting modes: 162
- ✔ Brightness levels: 3

Halloween 10-Pattern USB Projection Night Light
- ✔ Projection designs: 10 Halloween patterns
- ✔ Power source: USB
- ✔ Lighting method: LED
By the end, the room should feel atmospheric before playback and remain comfortable during a film. The screen should still be the brightest visual focus, walkways should remain visible, and you should be able to lower or switch off decorative effects quickly.
Difficulty: Beginner | Time: 45-90 minutes
What You’ll Need
Tools & Materials:
- Dimmable LED bulbs, LED strips, or plug-in accent lights rated for indoor use
- Compatible dimmer, remote, or smart-home controller, if required
- Measuring tape
- Removable cable clips or hook-and-loop cable ties
- Soft cloth for cleaning light-mounting surfaces
- Phone camera or a friend to help check glare and brightness from seats
Knowledge:
- Basic ability to plug in lights and follow the manufacturer’s setup instructions
- Basic understanding of your room’s outlets and viewing positions
Check that bulbs, strips, and controllers are compatible before buying or installing them. Use low-voltage LED strips with their specified power supply, and follow the product’s placement and ventilation instructions. Do not cover power supplies, overload outlets, run cords under rugs, or attach lights where they could fall onto a projector, speakers, or people. A 45-90 minute estimate includes basic layout, installation, and testing; wireless pairing or adhesive preparation may take longer.
JMEXSUSS 100 LED Orange and Purple Halloween Fairy Lights, USB Powered
Our best overall pick is the JMEXSUSS 100 LED strand because it offers the most flexible route to a spooky media-room glow. Its 33 feet of black wire can trace a shelf, mantel, doorway, or the back edge of a media console, letting us place color where it supports the room instead of projecting directly into the viewing area. The orange-and-purple palette reads as Halloween-themed without relying on animated imagery that could compete with a film.Its remote adds practical control that matters in a viewing space: we can adjust brightness, choose among eight modes, and use a timer without reaching behind furniture. Compared with the galaxy projector, this strand gives us more control over where the light appears, but it does not create a room-wide aurora effect. Compared with the compact Halloween projector, it is less literal and more useful as everyday accent lighting during the season.The tradeoff is power and placement. USB operation works with compatible adapters or power banks, but the USB plug must stay dry, and the product is listed for indoor use even though its description mentions outdoor decorating. We would keep it inside and route the cable carefully. It suits buyers who want controlled color around a screen; those looking for moving ceiling effects or distinct Halloween figures should choose one of the projectors instead.
Pros:
- 33-foot strand with 100 LEDs can cover a longer decorative run.
- Black flexible wire is easier to blend into dark media-room furnishings.
- Remote provides eight modes, dimming, and a timer.
- USB power can work with compatible adapters and power banks.
Cons:
- The USB plug must remain dry.
- Listed for indoor use, so outdoor placement should not be assumed.
Best for: Media-room owners who want a long, adjustable orange-and-purple accent line around shelves, a mantel, or a screen surround.
Not ideal for: Buyers who want wall-spanning projection effects, battery-only operation, or a light they can place where the USB connection may get wet.
Bottom line: We recommend the JMEXSUSS strand for the broadest mix of controllable, screen-friendly Halloween accent lighting, provided its USB connection can stay dry.
“<p>We recommend the <strong>JMEXSUSS strand</strong> for the broadest mix of controllable, screen-friendly Halloween accent lighting, provided its USB connection can stay dry.</p>”
18-Color Northern Lights Galaxy Projector Night Light
When a line of fairy lights feels too contained, the Northern Lights Galaxy Projector shifts the effect onto the room itself. Its cube design has five luminous surfaces, and the combination of 18 colors, 162 modes, and three brightness levels gives us more ways to tune the mood than either of the other picks. For a media room, that range is useful if we want a changing color wash on a wall or ceiling before a movie, or a calmer, dimmer setting while watching.Compared with the JMEXSUSS strand, this projector is less precise about outlining shelves or furniture, but it can make the lighting feel more enveloping. Compared with the Halloween pattern projector, it emphasizes color and atmosphere rather than recognizable Halloween figures. That makes it the more adaptable option beyond October, although its effect is less explicitly spooky unless we select suitable colors and modes.Touch controls and a remote make adjustment convenient from a seat, and the one-hour auto-off is helpful for relaxation or bedtime. The limitation is that only a one-hour timer is specified; buyers who need a longer session timer should not assume one is available. Its large mode count also favors experimentation over simple, immediate control. Choose it for flexible ambient color, not if your priority is a defined pumpkin or witch projection.
Pros:
- 18 colors and 162 modes provide a broad range of effects.
- Three brightness levels make it easier to adapt the glow for viewing or relaxation.
- Five luminous surfaces are designed to create a wider ambient effect.
- Touch controls and a remote offer more than one way to adjust it.
Cons:
- The specified auto-off timer is limited to one hour.
- Its many modes may be less straightforward than a simple, fixed lighting setup.
Best for: Viewers who want adjustable color effects across room surfaces and prefer an atmospheric wash over a strand or fixed Halloween image.
Not ideal for: Buyers who want simple Halloween-specific patterns, a long or customizable auto-off timer, or precise accent lighting along a shelf.
Bottom line: We would choose this projector over the fairy lights for changeable, room-wide color, but its stated one-hour timer is a real constraint for longer sessions.
“<p>We would choose this projector over the fairy lights for <strong>changeable, room-wide color</strong>, but its stated one-hour timer is a real constraint for longer sessions.</p>”
Halloween 10-Pattern USB Projection Night Light
This compact projector is the most explicitly Halloween-themed option in our lineup. Rather than bathing a room in color, it casts 10 seasonal designs, including witches, vampires, pumpkins, and black cats, onto a wall or ceiling. Its 360-degree adjustable rotation helps direct the projection toward a suitable surface, while its small tabletop form is easier to fit on a media console than a larger decorative setup.That focused approach makes it a different choice from both competitors. The JMEXSUSS strand is better for a continuous border of soft orange-and-purple light, and the galaxy projector offers more color variety and ambient effects. This model wins when recognizable Halloween imagery matters most, but it is also the least flexible for non-seasonal use. A pattern can be charming before a movie or during a party; during viewing, we would aim it away from the screen to avoid visual distraction.USB power makes it practical with a compatible adapter, computer, or power bank, but it still needs a connected source. The plastic tabletop design is compact, not weatherproof: it is not waterproof, so it belongs indoors and away from spills. The product details do not specify brightness adjustment or a timer, so buyers seeking those controls should favor the JMEXSUSS strand or galaxy projector. This is a focused accent, not a complete room-lighting system.
Pros:
- Projects 10 Halloween patterns, including familiar seasonal characters and objects.
- 360-degree adjustment helps aim the image at a wall or ceiling.
- Compact 2 x 1 x 4-inch tabletop design takes up little space.
- USB power can work with compatible adapters, computers, and power banks.
Cons:
- It is not waterproof and should remain indoors.
- Requires a USB power source rather than operating independently.
- Brightness adjustment and timer functions are not specified.
Best for: Buyers who want a small tabletop light that projects recognizable Halloween designs onto a wall or ceiling.
Not ideal for: Anyone seeking adjustable brightness, a stated timer, broad ambient color, or a light suitable for wet or outdoor settings.
Bottom line: We recommend it when Halloween imagery is the point, but not as a substitute for the adjustable ambient glow offered by the other two picks.
“<p>We recommend it when <strong>Halloween imagery is the point</strong>, but not as a substitute for the adjustable ambient glow offered by the other two picks.</p>”
As an Amazon Associate we earn from qualifying purchases.
Before You Start
Choose the mood before you choose colors. A subtle haunted look usually works with one cool base color, such as deep blue or violet, plus a small amount of red, amber, or green in one accent area. More colors and fast effects can compete with the film and make it harder to see the room.
Turn on the room lights and identify the screen, seating, speakers, vents, walkways, and outlets. Keep decorative lighting out of the screen’s direct line of sight and away from surfaces that become hot. If anyone in the household is sensitive to flashing lights, skip strobe and rapid-flicker effects; steady light or slow fades are safer choices.
Step-by-Step Instructions
Step 1: Map the viewing area
Sit in each regular viewing seat and note what is visible around the screen: wall edges, the floor, shelves, and any reflective surfaces. Mark likely light locations with removable tape. Favor areas behind or beside the seating, along the lower wall, or behind furniture. Avoid placing a bright source directly behind the screen or where it shines toward viewers.
Measure the paths between seats, doors, and equipment. Keep those routes clear of light fixtures and cables. If you use a projector, leave its intake and exhaust vents unobstructed.
Tip: A light hidden behind a sofa or shelf can create a colored wall wash without putting the light source in the viewer’s eyes.
Check: You have a short list of mounting locations that are out of direct view, away from vents, and clear of walking routes.
Step 2: Choose a simple lighting palette
Select one main color for the room and, if desired, one accent color for a smaller area. Deep blue or violet can create a cool, eerie background; dim red or amber can add warmth near a doorway or prop display. Use neutral white only where you need practical visibility, such as a path or equipment shelf.
Check whether your lights can dim and whether the controller supports steady colors or slow fades. Avoid planning around a flashing effect. If the product offers brightness percentages, treat them as a starting point rather than a fixed target; the screen, room paint, and viewer sensitivity all affect perceived brightness.
Tip: If you are unsure, start with one color. Add an accent only after testing the main light during actual playback.
Check: You have chosen a small palette and confirmed that the lights can be dimmed or switched off independently of the screen.
Step 3: Prepare the mounting surfaces and equipment
Unplug the lights before mounting them. Wipe the selected surfaces with a clean, dry cloth and let them dry fully. Check the product instructions for suitable surfaces and temperature limits. Do not attach adhesive strips to dusty, damp, textured, or hot surfaces unless the manufacturer permits it.
Lay out the light, power supply, controller, and cable route before peeling adhesive backing or securing clips. Confirm that the cable reaches an outlet without stretching, crossing a walkway, or passing through a door pinch point. Keep power supplies accessible and uncovered.
Tip: Adhesive backing may not hold on every wall finish. Use the mounting method recommended for the light rather than adding tape or glue that could damage the surface or interfere with cooling.
Check: The surfaces are clean, the full cable path is planned, and each power supply will sit in an open, reachable location.
Step 4: Install the main ambient light
Mount the main light behind furniture, along a lower wall, or in another indirect position according to its instructions. For an LED strip, follow the marked bend limits and do not crease, cut, or connect it except at specified points. Press the strip or clips into place as directed, then connect the controller and power supply.
Plug the light into a suitable outlet and switch it on at low brightness. Check the mounting and cable route before adding other lights. If a strip starts to peel, turns unusually warm, or exposes damaged wiring, switch it off and correct the mounting or replace the damaged part before continuing.
Tip: Keep strips and lamps away from speaker cones, projector vents, and surfaces that can vibrate or heat up.
Check: The main light stays in place, powers on steadily, and casts light onto a wall or floor rather than into the seats or screen.
Step 5: Add an accent and secure cables
Add one small accent light near a doorway, shelf, or side wall if the room needs more depth. Aim it at a surface rather than directly at the screen or viewers. Keep it dimmer than the main ambient light so it supports the scene instead of becoming the focus.
Secure loose cable along furniture edges or walls with removable clips or ties. Leave enough slack at plugs and connectors to prevent pulling, but do not coil excess cable around a power supply. Keep every cable out of walkways and away from hot equipment. Do not run cords beneath rugs or pinch them under furniture.
Tip: If the accent creates a bright reflection on the screen, move or turn it before reducing the whole room’s lighting.
Check: The accent adds a subtle second area of color, and all cables are secured without blocking a route or covering a vent.
Step 6: Set viewing and pre-show scenes
Use the remote, dimmer, or app to create two settings if your equipment supports them. Set a pre-show scene with a little more light for finding seats, then a viewing scene with the ambient lights low and steady. Keep a practical path light available if viewers need to leave during playback.
Test the controls from your regular seat. Confirm that you can dim the lights, turn off the accent, and restore normal room lighting without walking behind furniture or reaching near hot equipment. If you use an app, label the settings clearly, such as “Pre-show” and “Viewing.”
Tip: Do not depend on an internet connection for a basic off switch. Keep the physical switch or remote easy to reach.
Check: You can change between the two settings from the seating area, and the viewing setting does not flash or shift colors rapidly.
Step 7: Test the setup during playback
Play a dark scene or a few minutes of the type of content you watch. Sit in each usual seat and look for glare on the screen, distracting reflections, overly bright wall patches, and areas too dark to cross safely. Ask another person to check the room from a seat you do not occupy, if possible.
Adjust one light at a time. First move or aim any source that shines toward a viewer; then lower brightness; then adjust the color. Make small changes and replay the same scene so you can tell what helped. Check the setup again with the screen off to confirm the path light is sufficient for entering and leaving.
Tip: A camera can help reveal uneven color or bright reflections, but judge final comfort with your eyes from the viewing seats.
Check: The screen remains easy to watch, the room feels atmospheric, and people can see the floor and exits without switching on full room lighting.
Common Mistakes to Avoid
- Making every light bright or using many saturated colors at once. — Begin with one dim base color and add only one accent. Test during playback, then lower or remove any light that competes with the screen.
- Aiming lights at the screen or directly toward viewers. — Use indirect placement and check from every regular seat before settling on a location. Move the source before changing the whole room’s brightness.
- Using fast flashes or repeated color changes for atmosphere. — Choose a steady color or slow fade. Avoid flashing effects, particularly when viewers may be sensitive to flicker or have a photosensitive condition.
- Leaving cables loose or covering a power supply. — Route cables along walls or furniture, keep walkways clear, and leave power supplies uncovered with room to dissipate heat.
Troubleshooting
Problem: The screen looks washed out or has colored reflections.
Solution: Turn off the accent lights one at a time to find the source. Move the light farther from the screen, aim it at a side wall or floor, and reduce its brightness. Check glossy furniture and decor for reflections too.
Problem: The room feels too dark to move around safely.
Solution: Add a dim, steady path light near the floor or doorway, aimed away from the screen. Keep it separate from the main viewing lights so you can leave it on when needed.
Problem: An LED strip will not stay attached.
Solution: Switch it off, remove it gently, and check the product’s surface requirements. Clean and dry the surface, then use the supplied mounting clips or another manufacturer-approved method. Do not mount it where heat or dust will weaken the attachment.
Problem: A smart light will not pair or respond to its controller.
Solution: Check that the light, power supply, and controller are compatible and powered. Follow the manufacturer’s reset and pairing sequence, and confirm the phone is connected to the required network if setup uses an app. Use the physical control until pairing works.
What Success Looks Like
The finished room has a restrained spooky color wash and, if useful, one dim accent. From every regular seat, the screen has no distracting glare or colored reflection. The lights stay steady or change slowly, the floor and exits remain visible, cables do not cross walkways, and power supplies remain uncovered. You can switch to a brighter pre-show setting or turn the decorative lights off from your seat.
Next Steps
Use the viewing scene for a full movie and make small adjustments afterward rather than adding more lights immediately. Recheck adhesive mounts and cable clips before each event, especially after moving furniture or cleaning. Turn off and unplug decorative lights when they are not in use if the product instructions call for it. Remove temporary decorations carefully, and replace any light, cable, or power supply that shows damage, unusual heat, or unreliable operation.
Frequently Asked Questions
What colors work well for spooky media-room lighting?
Deep blue or violet makes a useful low-level base, while a small amount of red, amber, or green can add an accent. Choose colors that suit your screen and room; test them during playback because bright or reflective walls can change how a color feels.
Should the lights stay on while I watch a movie?
They can stay on if they are dim, indirect, and do not reflect on the screen. Keep a separate low path light available if viewers need to move around, and turn off any source that distracts from the picture.
Can I use candles for spooky room lighting?
Battery-powered LED candles are a safer option for a media room. Avoid open flames near curtains, seating, cables, electronics, or crowded walkways. Follow the candle product’s instructions and place it where it cannot be knocked over.
Do I need smart lights to create this effect?
No. Dimmable plug-in lights or LED strips with a physical remote can provide steady colors and brightness control. Smart lights are optional; confirm compatibility and keep a reachable physical off switch.
How can I make the setup comfortable for people sensitive to light?
Use steady, dim light and avoid strobes, rapid fades, and automatic color cycling. Ask viewers about their preferences, provide a simple way to turn the effects off, and keep ordinary room lighting accessible.
Fall Picks
fall essentials
As an affiliate, we earn on qualifying purchases.