
TL;DR

Get business pricing on your home office setup
- Business-only prices and quantity discounts
- Tax-exempt purchasing
- Multiple users, one account, clear invoices
Proper placement of acoustic panels—especially at first reflection points—can cut echo by up to 70%. Covering 15-25% of your room’s surface area maximizes their effectiveness without making your space feel overly dead.
Imagine trying to concentrate in a room where every word bounces around, echoing off the walls. Frustrating, right? The good news: a handful of well-placed acoustic panels can turn that noisy chaos into a calm, focused space. In this guide, you’ll learn exactly where to put them and how to get the best results—no guesswork involved.
If you work from home or study online, sound quality matters more than you think. From better Zoom calls to fewer distractions, strategic placement of acoustic panels can make your space feel more professional and less stressful. Ready to transform your home office? Let’s get started.
Place panels at first reflection points for up to 70% reduction in echo.
Cover 15-25% of your room’s surface for effective sound control.
Use the mirror trick to identify reflection points easily.
Don’t overdo it—balance acoustic treatment with natural room feel.
Choose panels that match your decor to keep your space inspiring.
Why placement is everything for acoustic panels
Simply sticking panels anywhere won’t do much. Their effectiveness depends on where you put them. Proper placement targets the spots where sound waves bounce most—reducing echo and improving clarity. For example, placing panels behind your monitor or near your seating area absorbs sound before it reflects around the room.
Imagine sitting at your desk, speaking into your microphone. Without treatment, your voice hits the walls, bounces back, and creates a muddy, echoey sound. Strategic placement prevents this. It’s like giving your room a gentle muffler, making speech crisp and background noise quieter.
As an affiliate, we earn on qualifying purchases.
Where to put acoustic panels for maximum impact
The most effective spots are the ‘first reflection points.’ These are the surfaces where sound hits first after leaving your mouth or speakers. To find them, sit in your usual position, have someone move a mirror along the walls until you see your speakers or your face in it. Mark those spots.
Here’s a quick list of key placement areas:
- First reflection points on side walls—absorb those bouncing sounds.
- Behind your monitor or microphone—catches direct reflections.
- Ceiling—reduces sound bouncing down from above.
- Room corners—place bass traps for low-frequency control.
Understanding why these spots matter helps you optimize your treatment. Reflection points are where sound waves converge and bounce back into your ears, causing muddiness and echo. By placing panels at these critical spots, you effectively break the chain of reverberation, leading to clearer, more natural sound. Additionally, addressing corners with bass traps prevents low-frequency buildup, which can make your space feel boomy or muddy—especially important if your room is small or has hard surfaces. The tradeoff is that over-treating can make the room sound unnaturally dead, so strategic placement is key to balancing clarity with liveliness.
As an affiliate, we earn on qualifying purchases.
How many panels do you really need?
More isn’t always better, but coverage matters. To make a real difference, aim to cover about 15-25% of your room’s surface area. Smaller rooms might need fewer panels, while bigger spaces may require more for even sound absorption.
For example, a 10×12-foot room would benefit from about 4-6 panels, covering roughly 25 square feet. Place them at reflection points, and you’ll notice a marked difference in sound clarity during calls and focused work. However, be mindful that excessive coverage can make the room sound overly dampened, which can negatively affect speech intelligibility and make the space feel less inviting. The goal is to strike a balance: enough treatment to control echo but not so much that the room loses its natural acoustics. The tradeoff is between achieving clarity and maintaining a comfortable, lively environment.
first reflection point acoustic panels
As an affiliate, we earn on qualifying purchases.
As an affiliate, we earn on qualifying purchases.
Design and style tips for seamless integration
Acoustic panels aren’t just functional—they can also enhance your room’s style. They come in vibrant colors, sleek fabrics, and interesting shapes. Think of panels as a canvas—your choice of design can complement your decor or add a pop of color.
For instance, a home office with neutral tones might feature dark gray or patterned panels to add visual interest without clashing. Or, choose panels with artwork or embedded lighting for a personalized touch. The goal: blend form and function effortlessly.
home office sound absorption panels
As an affiliate, we earn on qualifying purchases.
As an affiliate, we earn on qualifying purchases.
Simple steps to install your acoustic panels
- Identify the key reflection points using the mirror trick.
- Mark where you want to place the panels.
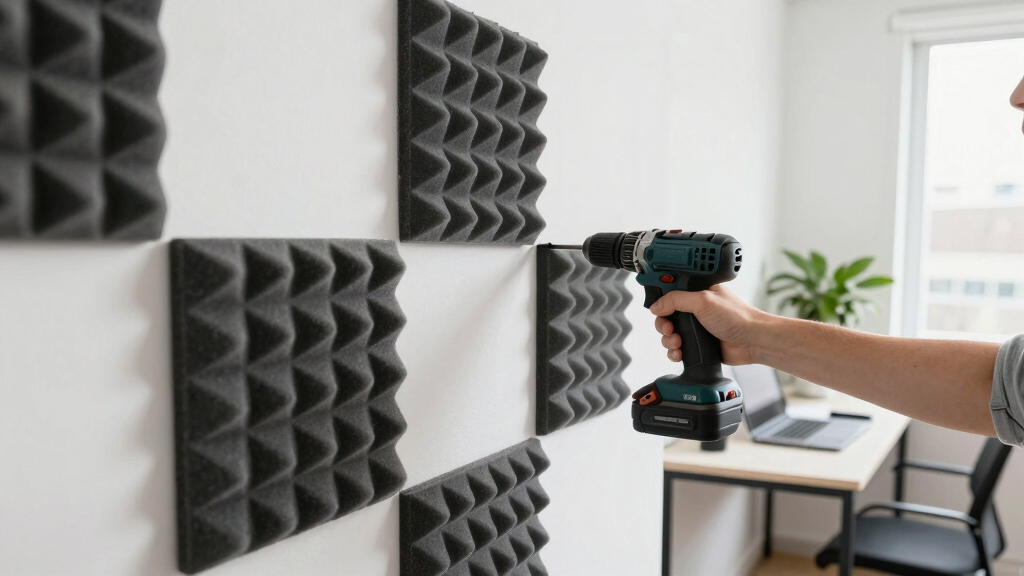
- Choose the right mounting hardware—adhesive strips for lightweight panels, brackets for heavier ones.
- Attach panels securely at ear level or slightly above, ensuring they’re flat against the wall.
- Adjust placement as needed based on your acoustic results and aesthetic preferences.
For example, many DIYers use command strips for lightweight foam panels, which are easy to remove and won’t damage walls. For fabric panels, toggle bolts or picture hooks work well.
Latest innovations in acoustic panel tech
New materials and designs make acoustic panels smarter and more eco-friendly. Some panels now use recycled fabrics or biodegradable foam. Others incorporate adjustable features—like panels that can be moved or reconfigured easily.
For example, modular panels that snap together allow you to customize your setup as your needs change. Some brands even embed artwork or lighting into panels, transforming them from sound absorbers into design features.
How to balance sound absorption with room feel
Overdoing acoustic treatment can make your room feel ‘dead,’ muffling all sound and creating an unnatural environment. The key is balance. Use enough panels to control echo but leave some space for natural ambiance.
For example, in a large room, focus on the reflection points and corners, but keep open areas free of panels. This way, you get clarity without sacrificing liveliness. Understanding this balance is crucial because excessive treatment can lead to a space that feels sterile and uncomfortable, diminishing the natural acoustics of your environment. Conversely, too little treatment leaves echo and muddiness, compromising clarity. Striking the right balance ensures your room remains both functional and inviting, providing clarity without sacrificing the room’s natural warmth and liveliness.
Frequently Asked Questions
Where should I place acoustic panels in my home office?
Focus on the first reflection points on side walls, behind your monitor, and the ceiling. These spots absorb sound waves before they bounce around, reducing echo and improving clarity.How many panels do I need for my room?
Aim for covering about 15-25% of the room’s surface area. For a typical home office of around 120 square feet, 4-6 panels usually suffice, depending on your desired level of absorption.Can I install acoustic panels myself?
Yes, most panels are designed for easy DIY mounting with adhesive strips, hooks, or brackets. Just follow the steps to identify reflection points and use appropriate hardware.Will acoustic panels improve my video call sound?
Absolutely. They cut down echo and background noise, making your speech clearer and your audio more professional.Are decorative panels available?
Yes. You can find panels in various colors, patterns, and shapes that blend seamlessly into your decor or act as statement pieces.Conclusion
Effective acoustic treatment isn’t about covering every wall; it’s about placement and balance. A few well-placed panels can make your home office sound clearer and feel calmer. Start with the reflection points, and enjoy a space that’s both functional and inviting.
Imagine closing your laptop after a focused session, knowing your room is tuned just right. That’s the power of smart placement—less echo, more focus, better work.
Fall Picks
fall essentials
As an affiliate, we earn on qualifying purchases.