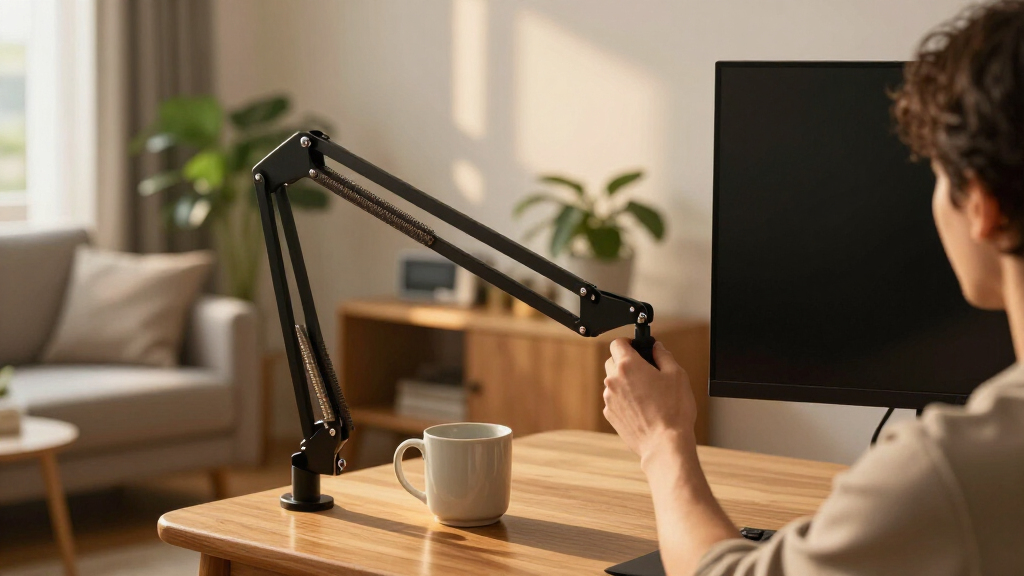

Adjust your installed monitor arm to place the screen at a comfortable height, viewing distance, and angle, then check that it remains steady when you let go. This guide is for anyone with a monitor already mounted on a desk clamp, grommet mount, or wall-mounted arm; it does not cover installing the arm or attaching the monitor. Allow about 10-20 minutes. You will need to identify your arm’s adjustment controls and make small changes while supporting the screen.

Get business pricing on your home office setup
- Business-only prices and quantity discounts
- Tax-exempt purchasing
- Multiple users, one account, clear invoices

NB Extra-Height Gaming Monitor Arm for 32–60-Inch Screens
- ✔ Compatible screen size: 32–60 inches
- ✔ Supported monitor weight: 2–20 kg
- ✔ VESA compatibility: 75 × 75 mm or 100 × 100 mm

NB SmooVex Mechanical Spring Monitor Arm, Black
- ✔ Compatible screen size: 17–32 inches
- ✔ VESA compatibility: 75 × 75 mm or 100 × 100 mm
- ✔ Height travel: 230 mm

HUANUO FlowLift Dual Monitor Desk Mount
- ✔ Monitor count: Two
- ✔ Compatible screen size: 13–32 inches per screen
- ✔ Weight capacity: 4.4–19.8 lb per arm
Difficulty: Beginner | Time: 10-20 minutes
What You’ll Need
Tools & Materials:
- The monitor arm’s adjustment manual, if available
- Hex key or screwdriver specified by the arm manufacturer, if tension adjustment is needed
- A soft cloth or a second person to help support a large or heavy monitor
Knowledge:
- Basic familiarity with moving a monitor and using a hand tool
- The approximate weight of the monitor, if available
Check the arm and monitor manuals for weight limits and adjustment instructions. Do not loosen mounting bolts or joints that secure the arm to the desk or wall. If the monitor feels loose, the mount shifts, or any part is cracked, stop and address the mounting problem before adjusting the arm.
NB Extra-Height Gaming Monitor Arm for 32–60-Inch Screens
The NB F7 earns our top spot for buyers whose monitor size makes ordinary arms a poor fit. It supports displays from 32 to 60 inches and loads from 2 to 20 kg, giving it a substantially wider stated range than the SmooVex, which tops out at 32 inches. Its height adjustment reaches up to 27 inches above the desk, making it the most compelling option here when screen elevation is a priority.The adjustment range is also broad: ±50-degree tilt, ±90-degree swivel, and 360-degree rotation. That flexibility can help position a large display for a seated workspace or change its orientation, provided the monitor’s size, weight, and VESA attachment are within the stated limits. Clamp and grommet mounting offer two ways to attach it, while a quick-release design and cable management help with setup and tidying. RGB lighting is an added gaming-oriented feature, not a reason on its own to choose this arm over a better-fitting alternative.There are real tradeoffs. At 7.2 kg, this is the heaviest arm in the lineup, and its 75 × 75 mm or 100 × 100 mm VESA requirement excludes monitors without those mounting holes unless a suitable compatible solution is available. Compared with the lighter SmooVex, it is an overbuilt choice for a standard small display. Choose it for the unusually large screen or height reach—not simply because its limits are higher.
Pros:
- Supports compatible monitors from 32 to 60 inches and 2–20 kg.
- Offers up to 27 inches of height adjustment plus tilt, swivel, and full rotation.
- Provides both clamp and grommet mounting options.
- Includes cable management, quick-release installation, and built-in RGB lighting.
Cons:
- Compatibility is limited to 75 × 75 mm or 100 × 100 mm VESA patterns.
- Its 7.2 kg item weight makes it a substantially heavier option than the SmooVex.
- Its large-screen capacity may be unnecessary for typical smaller monitors.
Best for: Buyers with a compatible 32–60-inch monitor who need substantial height adjustment and broad screen positioning.
Not ideal for: People with a monitor above 20 kg, no compatible VESA pattern, or a compact screen that does not need this arm’s larger capacity.
Bottom line: For compatible large displays, the NB F7 combines the lineup’s broadest screen support with its greatest stated height reach, but it is more arm than many compact setups need.
“For compatible large displays, the NB F7 combines the lineup’s broadest screen support with its greatest stated height reach, but it is more arm than many compact setups need.”
NB SmooVex Mechanical Spring Monitor Arm, Black
For a standard-sized display, the NB SmooVex is the more proportionate choice than the F7. It supports flat or curved monitors from 17 to 32 inches and weighs 2.5 kg, compared with the F7’s 7.2 kg. A mechanical spring system is designed to make screen repositioning smooth, while 230 mm of height travel gives a clear adjustment figure for buyers planning a conventional seated workstation.It can tilt from −25° to 90°, rotate ±90°, and swivel for changes in viewing angle. That makes it versatile for switching between a straight-on working position and a more angled view. Both C-clamp and grommet mounting are available, matching the flexibility offered by the F7. Unlike the FlowLift, however, the SmooVex is for one screen rather than a paired-monitor layout.The main constraint is easy to understand: 32 inches is the upper screen limit, so it is not an alternative to the F7 for a larger display. It also requires one of the listed VESA patterns, and the product information does not state a supported monitor-weight range. Buyers should confirm that the monitor’s weight is supported before settling on it. This is our pick for a typical single-screen desk, not the most suitable option for every monitor.
Pros:
- Mechanical spring system is designed for smooth screen movement.
- Provides 230 mm of height travel and a wide stated tilt range.
- Supports flat or curved monitors from 17 to 32 inches.
- Includes C-clamp and grommet mounting options.
Cons:
- Does not support screens larger than 32 inches.
- Requires a 75 × 75 mm or 100 × 100 mm VESA pattern.
- A supported monitor-weight range is not provided in the supplied specifications.
Best for: People positioning one compatible 17–32-inch flat or curved monitor who want a mechanical-spring articulating arm.
Not ideal for: Owners of monitors over 32 inches, monitors without a listed VESA pattern, or buyers who need a stated weight capacity before purchase.
Bottom line: The SmooVex is a practical single-screen alternative to the heavier F7, provided your monitor fits its size and VESA limits and its weight is confirmed as compatible.
“The SmooVex is a practical single-screen alternative to the heavier F7, provided your monitor fits its size and VESA limits and its weight is confirmed as compatible.”
HUANUO FlowLift Dual Monitor Desk Mount
The HUANUO FlowLift is the clear specialist in this group: it mounts two monitors rather than one. Each screen can be 13–32 inches and must weigh 4.4–19.8 lb, with a 75 × 75 mm or 100 × 100 mm VESA pattern. For a workstation built around two compatible displays, its dual-arm layout and built-in cable management can consolidate mounting and clear desk space. Neither NB arm in this roundup offers that same two-screen role.Both screens can be adjusted with tilt, swivel, and 360-degree rotation, and the stated maximum height is 15.75 inches. That should be assessed against your actual desk and viewing position: it is less height reach than the F7’s listed 27 inches, so buyers needing a particularly elevated large screen should look to the NB option instead. The FlowLift attaches by C-clamp or grommet and specifies compatibility with wooden desks between 0.59 and 3.54 inches thick.That desk qualification is the most important reason to pause before choosing it. The mount is not recommended for glass or plastic desks, and both monitors must independently meet the size, weight, and VESA requirements. It is less flexible as a general-purpose recommendation than the single-screen SmooVex, but for two displays on a suitable wooden desk, it addresses a need the other picks do not.
Pros:
- Mounts two compatible monitors, unlike either single-monitor NB option.
- Provides tilt, swivel, and 360-degree rotation for screen positioning.
- Includes C-clamp or grommet mounting and built-in cable management.
- Specifies compatible wooden-desk thickness from 0.59 to 3.54 inches.
Cons:
- Not recommended for glass or plastic desks.
- Each monitor must meet the 13–32-inch and 4.4–19.8 lb limits and have compatible VESA holes.
- Maximum height of 15.75 inches is below the F7’s stated 27-inch reach.
Best for: People who want to mount two 13–32-inch monitors on a compatible wooden desk and free up desktop space.
Not ideal for: Users with glass or plastic desks, monitors outside the per-arm size or weight limits, or a need for the F7’s greater height reach.
Bottom line: Choose the FlowLift when two compatible monitors and a suitable wooden desk are the priority; for a single screen or greater height reach, the NB arms are a better fit.
“Choose the FlowLift when two compatible monitors and a suitable wooden desk are the priority; for a single screen or greater height reach, the NB arms are a better fit.”
As an Amazon Associate we earn from qualifying purchases.
Before You Start
Clear the desk area where the screen may move, and keep cables from catching on the arm. Stand or sit in your usual working position before setting the screen. Move the monitor slowly with both hands: one hand on the monitor and another supporting the arm when needed. Keep fingers away from hinges and pinch points. If the arm has a tension screw, find the manufacturer’s direction for increasing and decreasing tension before turning it; do not guess based on screw direction.
Step-by-Step Instructions
Step 1: Set your seated position
Sit in your normal working posture with your back supported and shoulders relaxed. Face the monitor rather than turning your neck toward it. Keep the keyboard and mouse where you normally use them so the screen adjustment reflects your real desk setup.
Tip: If you use a sit-stand desk, choose the sitting or standing position you use most often, or adjust the monitor separately for each posture.
Check: You are sitting squarely at the desk and can look straight ahead without leaning toward the screen.
Step 2: Set the screen at a comfortable height
Raise or lower the monitor slowly while holding it with both hands. Position the top of the visible screen at or slightly below eye level, then let your eyes fall naturally toward the screen’s center. Move a gas-spring or counterbalanced arm steadily through its range without forcing it.
Tip: If you wear bifocals or progressive lenses, a slightly lower screen may help you see it without tilting your head back.
Check: Your head remains level, your neck feels relaxed, and you can view the full screen without looking sharply upward.
Step 3: Set the viewing distance
Move the monitor closer or farther by holding its sides and guiding the arm. Start with the screen about an arm’s length away, then adjust for your vision, screen size, and text size. Increase text scaling instead of leaning forward if the text is hard to read. Keep the monitor centered in front of you.
Tip: A large screen may need to sit farther away than a small one. Choose a distance that lets you read comfortably without leaning or squinting.
Check: You can read ordinary on-screen text while sitting back in your usual position, and the screen is centered with your body.
Step 4: Adjust tilt and swivel
Support the monitor and tilt its top edge slightly back or forward until the screen is easy to view without glare or neck strain. Swivel the screen so it faces you directly. If the arm has a rotating joint, turn the display gently and stop if you feel resistance or cable tension.
Tip: Change tilt in small increments. A strongly tilted screen can make text harder to read and may reflect lights or windows.
Check: The screen faces your eyes, text appears clear across the display, and reflections do not obstruct your normal viewing area.
Step 5: Set screen rotation if needed
Support the monitor with both hands and rotate it to portrait orientation using the display’s rotation joint, if the arm supports rotation. Check the manual if you are unsure. Turn the screen only as far as its cable connections allow, then set the operating system’s display orientation to match.
Tip: Do not twist the monitor by pulling one corner. This can strain the mount and cables.
Check: The monitor sits securely in the intended orientation, the image is correctly oriented, and no cable is pulled tight.
Step 6: Balance the arm if it drifts
Release the monitor after each position change and watch whether it stays put. If it slowly rises or sinks, support the screen and locate the arm’s tension adjustment point. Follow the manual to make a small tension change with the specified tool, then test again. Repeat in small increments until the arm holds the monitor at different heights.
Tip: Do not adjust tension while the monitor is unsupported. If the arm’s rated weight range does not include your monitor, a tension adjustment may not solve the problem.
Check: The arm remains at the chosen height when released and moves smoothly when you guide it by hand.
Step 7: Check movement, cables, and mounting stability
Move the monitor through the positions you expect to use, including the farthest reach and any intended rotation. Watch the cables and mount as you move it. Route cables through the arm’s clips without pulling them taut, and stop if the desk clamp, grommet mount, or wall plate shifts.
Tip: Leave enough cable slack for the full movement range, but keep excess cable from snagging in the arm joints.
Check: The arm moves without catching, cables remain connected and slack, and the base does not shift or lift.
Common Mistakes to Avoid
- Moving the screen by pushing one corner or forcing a stiff joint. — Support the monitor with both hands and guide it slowly. Stop if you encounter resistance, then check the manual and cable path before continuing.
- Turning the tension screw too far or adjusting the wrong fastener. — Identify the tension control in the arm manual, support the monitor, and make small changes. Leave mounting bolts and joint fasteners alone unless the manufacturer directs otherwise.
- Setting the height or distance while leaning forward. — Adjust from your normal working posture, then confirm you can see the screen without leaning or craning your neck.
- Routing cables so they pull tight or catch during movement. — Move the arm through its intended range and leave enough slack for every position before securing cables in clips.
Troubleshooting
Problem: The monitor slowly sinks or rises after you release it.
Solution:
Check that the monitor’s weight falls within the arm’s rated range. If it does, use the manual to locate the counterbalance control and adjust tension in small increments while supporting the display. If it still drifts, inspect for damage or contact the arm’s manufacturer.
Problem: The arm feels too stiff or will not move smoothly.
Solution:
Check for a cable snag, obstruction, or locked joint. Consult the manual for any movement lock or tension setting. Do not force the arm or loosen a structural fastener to make it move; stop and seek manufacturer guidance if the joint remains stuck.
Problem: The screen moves, but the desk clamp or base shifts.
Solution:
Stop adjusting. Check the mount’s installation instructions and the desk surface for a secure, compatible attachment. Do not continue using the arm until the base is stable; get help from the mount manufacturer or a qualified installer if needed.
Problem: The monitor cannot rotate fully or a cable becomes taut.
Solution:
Return the screen to a safe position and check the cable route and the monitor’s connector locations. Add suitable cable slack or reroute the cables through the arm clips. Do not force rotation beyond the cable’s reach or the arm’s supported range.
What Success Looks Like
The monitor is centered in front of you, its top edge is at or slightly below eye level, and the viewing distance lets you read without leaning forward. The screen faces you with a comfortable tilt, the arm holds its position without drifting, and the mount stays stable. Cables remain connected, slack, and clear of moving joints throughout the intended range of motion.
Next Steps
Use the setup for a short work session and make small corrections if you notice neck strain, glare, or a tendency to lean forward. Recheck cable slack whenever you change the monitor’s reach or rotate it. If the arm starts drifting, the mount shifts, or a joint develops unusual noise or looseness, stop moving it and check the manufacturer’s instructions before further use.
Frequently Asked Questions
Where should the top of my monitor sit?
Start with the top of the visible screen at or slightly below eye level while you are seated in your usual posture. Adjust lower if your lenses or neck comfort make that position easier to view.
How far away should the monitor be?
Begin at about an arm’s length. Move it closer or farther until you can read comfortably without leaning, and increase text size if needed. Screen size and eyesight affect the final distance.
Why does my monitor arm keep sinking?
The arm may need more counterbalance tension, or the monitor may be outside its supported weight range. Check the rated range and manual before making small tension adjustments. Do not keep tightening if the arm does not respond as expected.
Can I adjust the arm without tools?
Many arms let you move the screen without tools, but balancing a gas-spring or counterbalanced arm may require the specified hex key or another tool. Check the model’s instructions rather than turning an unidentified fastener.
Can I rotate my monitor to portrait orientation?
Only if the monitor and arm support rotation. Support the display while turning it, check for cable slack, and change the computer’s display orientation if the image does not rotate automatically.
Halloween Picks
halloween
As an affiliate, we earn on qualifying purchases.