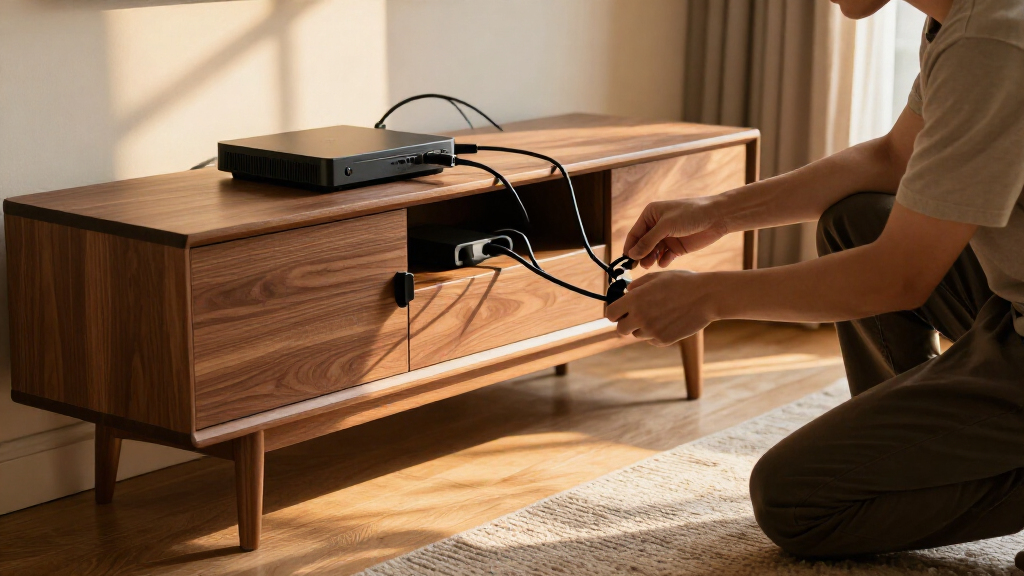

This checklist is for anyone organizing the cords that gather around a media room, whether they run across the floor, behind a desk, or beside the screen. Start by noting which cables need to stay accessible and which could be grouped or tucked away. Plan around your actual setup so the pieces you choose fit the space and the way you use it.

Get business pricing on your home office setup
- Business-only prices and quantity discounts
- Tax-exempt purchasing
- Multiple users, one account, clear invoices
The sections move from containing loose cords to routing them along furniture or walls, then bundling and powering devices. Each pick has a specific role: a box for cable clutter, a tray for under-desk routing, a raceway for wall wires, sleeves and ties for grouping, and a power strip for connecting equipment. Match each tool to its job before you shop.
Use the look-for points to compare dimensions, installation needs, and the cables you intend to manage. Check the path from each device to its power source, and leave room to reach connections you may need to unplug. Measure first and group by destination; that makes it easier to choose a useful combination instead of buying overlapping organizers.
Cable management box
A cable management box can gather loose cords and connections in one spot, helping reduce the visual clutter around a media setup. It is especially useful when several cables meet near a device or power source and you want them grouped together. The selected pick is an Extra-Large Wooden Cable Management Box with Magnetic Lid, so consider where its size and appearance will work in the room. Choose a location near the cable cluster, while keeping any connections you need to reach accessible. A common buying mistake is choosing a box based on appearance alone without checking whether the cords and plugs can fit inside. Trace the cables you want to contain, including the route they take into and out of the box. Check the available surface area and the box dimensions before committing. The magnetic lid may make access relevant to your routine, but do not assume the box accommodates every power device or cable arrangement. Confirm fit with your actual plugs and cord paths, and avoid bending cables sharply or blocking the connections you use often.What to look for:
- Compare the box dimensions with the intended surface
- Check that plugs and cable bundles can fit inside
- Plan clear entry and exit paths for cords
- Keep frequently used connections reachable
- Choose a location near the cords you want to gather
Extra-Large Wooden Cable Management Box with Magnetic Lid

This freestanding cable management box hides power strips and cords in home offices or living spaces. Made from solid acacia or beech wood, it has a magnetic lid and includes cable sleeves and clips.
Pros:
- Fits chargers of different heights, including standing MacBook chargers
- Solid wood construction offers a plastic-free option
- Includes cable sleeves and clips
- Magnetic lid helps keep the box securely closed
Cons:
- Listed for indoor use only
- Dimensions provided do not include the box height
Best for: Grouping a cable cluster in one spot
Not ideal for: Setups without room for a box
Bottom line: Measure the location and check your plugs before choosing this box.
Under desk cable tray
An under-desk tray gives cables a designated route beneath a work surface, which can help keep them from hanging loosely around the desk area. The selected Ascrono Original Under Desk Cable Management Tray is listed as 40.6 inches long, so compare that measurement with the underside of your desk and the cable span you want to manage. Check desk clearance and tray length together before deciding where it should go. A frequent mistake is buying a tray without considering how it attaches or whether the desk underside has enough usable space. Review the product’s installation details and your desk construction, and map where the legs, drawers, and other obstructions sit. Think through how cables will reach the tray and continue to their devices; a tray does not replace careful routing. Leave enough slack for devices that move, and keep plugs you need to access within reach. Plan the entry and exit points so cables do not have to stretch or cross awkwardly.What to look for:
- Measure the available underside space
- Compare the 40.6-inch length with your desk
- Review installation requirements and desk compatibility
- Map cable routes to and from the tray
- Allow slack for devices that move
Ascrono Original Under Desk Cable Management Tray, Black, 40.6 inches

This under desk cable management tray conceals cords, power strips, and adapters, keeping your workspace tidy and organized. Made from fire-retardant fabric, it supports up to 66 lbs and offers versatile mounting options for various desk setups.
Pros:
- Conceals cords and power strips for a tidy workspace
- Supports a large capacity for multiple devices
- Easy to install with versatile mounting options
Cons:
- Limited to a length of 40.6 inches, may not fit larger desks
- Fabric material may wear over time with heavy use
Best for: Routing cables beneath a desk
Not ideal for: Desks with limited underside clearance
Bottom line: Confirm the tray fits your desk and planned cable route.
Cable raceway kit
A wall raceway can provide a defined path for wires that otherwise run visibly along a wall. The selected pick is a 1260in Cord Hider Kit for Wall Wires, Paintable Cable Raceway, White. Consider the wall route you want to cover and whether the listed length suits it. Sketch the route before selecting a path, especially where the cables turn or meet a device. A common mistake is assuming a kit will fit every wall layout or blend in without preparation. Measure the intended run, account for corners and endpoints, and review the product details for installation and paint compatibility. Do not assume the raceway can conceal every kind or number of cable; compare its capacity with your actual wires. Check the wall surface and plan a route that keeps connections accessible. Match the raceway capacity and route to your wires, and avoid placing it where doors, furniture, or regular movement may interfere.What to look for:
- Measure the full wall route, including turns
- Compare the route length with the listed 1260in
- Check the raceway capacity against your cables
- Review installation and paint compatibility details
- Plan accessible endpoints near devices and outlets
1260in Cord Hider Kit for Wall Wires, Paintable Cable Raceway, White

This cord hider kit includes 1260 inches of paintable, easy-to-install cable covers designed to conceal wires along walls. The set features various connectors and accessories for a seamless and safe wire management solution, suitable for homes with kids and pets.
Pros:
- Easy to install without drilling or screws
- Paintable to match wall color for aesthetic integration
- Includes various connectors for flexible routing
Cons:
- Not suitable for textured walls with tape
- Requires cutting for shorter lengths
- Adhesion quality may vary on different wall surfaces
Best for: Routing visible wires along a wall
Not ideal for: Routes that exceed the planned kit coverage
Bottom line: Map and measure the wall run, then check capacity and installation details.
Cable management sleeves
Sleeves bundle multiple cords together along a shared route, making them easier to manage as a group. The selected Encased Neoprene Cable Management Sleeves are listed as 130 x 5.3 Inch, with two in the pack. Compare that size with the cable bundle and the path you need to cover. Group only cables that follow the same route so the bundle remains practical to handle. A common mistake is treating a sleeve as a substitute for planning cable lengths or access. Before bundling, identify which cords need to separate at different points and which connections you may need to reach. Check the product dimensions and how they correspond to your bundle; do not assume every cable or plug will fit. Leave enough slack where devices move, and avoid making a bundle so tight that it is difficult to adjust. Keep service points and branching cables accessible while using sleeves to organize the shared stretch.What to look for:
- Compare sleeve dimensions with your grouped cables
- Check how many bundles the two-pack will cover
- Separate cords that need different routes
- Leave slack for moving devices
- Keep connections and branch points accessible
Encased Neoprene Cable Management Sleeves, 130 x 5.3 Inch – 2 Pack

These flexible neoprene sleeves help organize and cover loose cables around desks, entertainment setups, and offices. Each sleeve measures 130 inches long and features a hook-and-loop closure for easy access and secure fit.
Pros:
- Flexible neoprene material easily bends around cords
- Large size provides generous coverage for multiple cables
- Hook-and-loop closure allows easy opening and secure fastening
- Includes two sleeves for versatile cable management
Cons:
- May not be suitable for outdoor or heavy-duty use
- Limited color options (not specified)
- Could be too long or wide for very small cable bundles
Best for: Bundling cables that share a route
Not ideal for: Cables that branch in many directions
Bottom line: Check the bundle size and access needs before enclosing cords.
Velcro cable ties
Reusable ties help keep a cable bundle together and can make adjustments easier when you add or remove a cord. The selected Nettbe Reusable Cable Ties are listed as 210 pieces, 6 inches, with adjustable cord straps. Consider how many bundles you have and whether a six-inch tie can wrap around each one. Use ties to organize manageable groups, not to force unrelated cables into one bundle. A common mistake is fastening ties too tightly or placing them where you cannot undo them when equipment changes. Sort cords by destination, leave slack for movement, and keep tie points easy to reach. Compare the listed tie length with the circumference of your planned bundles; a tie that is too short will not close comfortably. Use only enough tension to keep the cords together, and avoid sharp bends near plugs. Leave room to adjust and inspect connections so routine changes do not become a teardown.What to look for:
- Check whether six inches fits your cable bundles
- Estimate how many ties your setup needs
- Group cords by destination or shared route
- Place ties where they remain easy to undo
- Avoid tight fastening near plugs and bends
Nettbe Reusable Cable Ties, 210 PCS, 6 Inches, Adjustable Cord Straps, Wire Orga

These reusable nylon cable ties are designed for efficient cable management, helping to organize and secure wires in various settings. Made of high-quality, eco-friendly material, they are easy to use with a magic tape closure and suitable for home, office, and workplace use.
Pros:
- Reusable and eco-friendly
- Easy to use with magic tape closure
- Suitable for various environments
Cons:
- Adhesive strength may vary depending on surface
- Limited to 6-inch size
Best for: Adjustable bundles with several cords
Not ideal for: Bundles too large for six-inch ties
Bottom line: Check tie length against your bundles and keep fasteners accessible.
Surge protector power strip
A power strip can bring several power connections together near the devices they serve, making its placement part of cable planning. The selected pick is a GE Surge Protector Power Strip with 2 Tethered USB Ports. Consider where the strip will sit in relation to your equipment and the cords that need to reach it. Plan placement around reach and access before routing other cables around it. A common buying mistake is choosing a strip without checking the connections and spacing your devices require. Review the product details and compare them with the plugs and USB devices in your setup; the name specifies two tethered USB ports, but does not establish compatibility with every device. Check the cable path, outlet location, and whether the strip will remain accessible. Keep the strip and its connections clear of organizers that could make it difficult to use. Verify each device’s connection needs and leave room to reach the strip when you need to change equipment.What to look for:
- Check device plug and USB connection needs
- Confirm the two tethered USB ports suit your setup
- Plan reach from the strip to each device
- Keep the strip accessible after organizing cables
- Review product details for fit with your equipment
GE Surge Protector Power Strip with 2 Tethered USB Ports
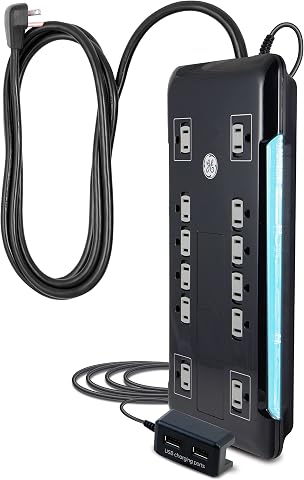
This surge protector features 12 outlets, including two USB ports for charging devices. It has an 8-foot extension cord, space-saving design, and surge protection with a 4320 joule rating, ensuring safety and reliability for home or office use.
Pros:
- Multiple outlets and USB ports for versatile charging
- Long extension cord for flexible placement
- High surge protection rating for safety
Cons:
- Limited to 120V electrical system
- No mention of smart or energy-saving features
Best for: A setup needing a central power location
Not ideal for: Devices whose plugs do not suit the strip
Bottom line: Check your device connections and plan an accessible location for the strip.
Start with the problem that affects your setup most: gather loose cords with a box, route a desk bundle beneath the surface, or plan a wall path for visible wires. Then add sleeves or ties where cords share a route, and place the power strip where its connections remain accessible. Buy in the order your layout needs, using measurements and device connections to avoid pieces that do not fit.
Cable organization works best when it follows how you use the room. Take a little time to map each route, leave room for adjustments, and keep the connections you reach often easy to access. A few well-chosen organizers can make the setup easier to manage; start with one cable cluster and build from there.
Columbus Day / Indigenous Peoples' Day Picks
long weekend sales
As an affiliate, we earn on qualifying purchases.