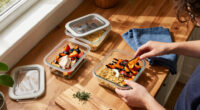
Use this guide to choose meal prep storage containers and pack portions for refrigeration, freezing, or reheating. It is for beginners who want meals that stay fresh, are easy to carry, and can be reheated with less mess. Allow 30-60 minutes for sorting containers and packing food, plus time for hot food to cool safely before refrigeration.

Get business pricing on your home office setup
- Business-only prices and quantity discounts
- Tax-exempt purchasing
- Multiple users, one account, clear invoices

Bentgo Prep Meal Prep Containers with Lids, 20 Piece, PFAS & BPA-Free
- ✔ Set contents: 10 trays and 10 custom-fit lids
- ✔ Capacity: 4 cups per container
- ✔ Compartments: One per tray

50 Pack (100-Piece) 32 oz Meal Prep Containers with Easy Open Lids, Black
- ✔ Set contents: 50 containers and 50 lids
- ✔ Capacity: 32 oz / 946 ml each
- ✔ Dimensions: 8.9 × 6.1 × 2.3 in

Dealusy 50 Pack (100-Piece) 24 oz Meal Prep Containers Reusable with Lids
- ✔ Set contents: 50 containers and 50 lids
- ✔ Capacity: 24 fl oz each
- ✔ Dimensions: 7.4 × 5 × 2 in
Difficulty: Beginner | Time: 30-60 minutes, plus cooling time
What You’ll Need
Tools & Materials:
- Food-safe containers with close-fitting lids
- Permanent marker or removable labels
- Clean, dry work surface
- Refrigerator set to 40°F (4°C) or below
- Freezer, if storing portions for later
- Measuring cups or a food scale, if you want consistent portions
Knowledge:
- Basic food handling and handwashing
- How to check a container’s manufacturer label for freezer and microwave use
Gather containers that match the meals you plan to store. Glass and plastic containers can both work when they are food-safe and used according to their labels. Check for cracks, warped lids, damaged seals, lingering odors, or scratches that are difficult to clean. Replace containers with damaged parts.
Bentgo Prep Meal Prep Containers with Lids, 20 Piece, PFAS & BPA-Free
Bentgo Prep is the most structured choice here for people who want meal prep to include portion planning, not just packing. Each tray has a 4-cup capacity and embossed measurements, so we can portion servings with a visual guide rather than estimating every meal. Compared with Dealusy’s 32-ounce containers, Bentgo gives us a labeled measuring aid, though the two capacities are broadly in the same range.The set includes 10 trays and 10 fitted lids, rather than the 50-container supply in either Dealusy option. That smaller quantity is easier to accommodate in a routine kitchen and makes sense if we rotate containers through the week. It will be less convenient if we prepare many meals at once, share a household’s meal prep, or want a large reserve of containers ready for guests and leftovers.Bentgo’s care instructions are also more specific: the trays are microwave, freezer, and top-shelf dishwasher safe, but the lids should be hand-washed for best results. Dealusy lists top-rack dishwasher cleaning for its containers, which may appeal when we want to process more pieces together. Bentgo’s PFAS- and BPA-free materials and clear stackable lids make it the clearest fit for a repeatable, organized lunch routine, provided we accept a little extra lid care.
Pros:
- Embossed measurements help portion meals consistently.
- Ten custom-fit lids and trays form a compact, matched set.
- PFAS- and BPA-free materials are specified.
- Trays are listed as microwave, freezer, and top-shelf dishwasher safe.
Cons:
- Lids should be hand-washed for best results.
- Ten containers provide less batch-prep capacity than either Dealusy 50-pack.
- Single-compartment trays do not separate foods within one meal.
Best for: Meal preppers who want reusable trays with measurement marks and a manageable set for weekday portions.
Not ideal for: Households that need dozens of containers at once or want lids that can go in the dishwasher.
Bottom line: For organized weekday meal prep, Bentgo’s portion marks and reusable 10-tray set make it the most balanced pick, as long as we are comfortable hand-washing the lids.
“For organized weekday meal prep, Bentgo’s portion marks and reusable 10-tray set make it the most balanced pick, as long as we are comfortable hand-washing the lids.”
50 Pack (100-Piece) 32 oz Meal Prep Containers with Easy Open Lids, Black
When we need more room in each container, Dealusy’s 32-ounce set is the strongest match in this lineup. Its stated capacity is larger than the 24-ounce Dealusy option, giving us extra space for fuller lunches or meals that combine a main dish with sides. Against Bentgo, it trades measurement marks for a much larger supply: 50 containers and 50 lids can cover an extended batch-prep cycle without relying on a small rotation.The product listing describes the containers as stackable, leakproof, BPA-free, and suitable for microwave and freezer use. It also lists a temperature range of -4°F to 248°F and says the containers can be hand-washed or placed on the top rack of a dishwasher. For someone packing multiple days of meals, those listed uses make the set versatile. Still, its larger size can be excessive for small portions, and a 50-piece container supply needs considerably more cupboard or pantry room than Bentgo’s ten-tray set.We would choose this over the 24-ounce Dealusy set when meal size is the priority; choose the smaller model when a more compact serving fits our routine. There is no listed portion-measurement aid like Bentgo’s embossed marks, so we should expect to estimate serving sizes ourselves. This is best treated as a high-volume plastic prep option, with its bulk and storage demands part of the decision.
Pros:
- 50 containers and 50 lids support high-volume batch prep.
- 32-ounce capacity accommodates larger portions than the 24-ounce Dealusy set.
- Listed as microwave, freezer, and top-rack dishwasher safe.
- Stackable design can help organize a set of matching containers.
Cons:
- The larger containers may be too much for lighter meals or small sides.
- A 50-container set takes more storage space than Bentgo’s 10-tray set.
- No embossed portion measurements are listed.
Best for: People who pack larger lunches, prepare many meals in one session, or want a large supply of matching containers.
Not ideal for: Anyone packing smaller portions, prioritizing measured servings, or short on storage space.
Bottom line: For large portions and frequent batch packing, this Dealusy set offers the most capacity and quantity, but its bulk is harder to justify for compact meal plans.
“For large portions and frequent batch packing, this Dealusy set offers the most capacity and quantity, but its bulk is harder to justify for compact meal plans.”
Dealusy 50 Pack (100-Piece) 24 oz Meal Prep Containers Reusable with Lids
Dealusy’s 24-ounce set keeps the high-volume format of its 32-ounce sibling while dialing back the capacity. That makes it the better match for lighter lunches, smaller portions, or meals where we want to keep sides separate in another container. The 50-container count is the same as the larger Dealusy set, so we can still prepare many meals in one session; the difference is how much food each container is designed to hold.Compared with Bentgo, this set offers five times as many containers, but Bentgo is the more useful choice when portion measurements matter. The 24-ounce Dealusy listing gives a fixed capacity and a square shape, not embossed measuring marks. That means we gain volume for batch packing but have less built-in guidance for consistent serving sizes. Its listed leakproof snap lids and stackable design support transport and storage, though we should still pack liquids cautiously because the description alone cannot establish how a container performs in every bag or orientation.Dealusy lists the containers as BPA-free, microwave and freezer safe, and top-rack dishwasher safe, with a stated temperature range of -4°F to 248°F. These are practical care claims for a reusable plastic set, but the 50-container footprint remains the main compromise. Choose this model over the 32-ounce version when a smaller serving is more appropriate; skip both bulk packs if we want a compact collection or prefer reusable materials other than plastic.
Pros:
- 50 containers and 50 lids suit repeated batch packing.
- 24-ounce capacity is more compact than the 32-ounce Dealusy model.
- Square shape offers a distinct alternative to the rectangular options.
- Listed for microwave, freezer, and top-rack dishwasher use.
Cons:
- Smaller capacity may not fit generous meals.
- The bulk set still requires substantial storage space.
- No portion markings are listed, unlike Bentgo’s embossed measurements.
Best for: Meal preppers who want many containers for smaller lunches, snacks, or portion-sized leftovers.
Not ideal for: People who regularly pack large meals or want clear built-in portion measurements.
Bottom line: This is the better Dealusy choice for smaller servings and large prep batches, provided we have room to store the set and do not need measuring marks.
“This is the better Dealusy choice for smaller servings and large prep batches, provided we have room to store the set and do not need measuring marks.”
As an Amazon Associate we earn from qualifying purchases.
Before You Start
Set your refrigerator to 40°F (4°C) or colder. Plan which meals will be eaten within a few days and which need freezing. Refrigerate perishable cooked food within two hours of cooking, or within one hour if the room is above 90°F (32°C). Do not leave food out while waiting for it to reach room temperature; divide large batches into shallow portions so they cool faster.
Check each container’s instructions before putting it in the microwave, freezer, or dishwasher. A container that is safe for one use may not be rated for another. Keep raw meat and its juices away from cooked food and ready-to-eat ingredients.
Step-by-Step Instructions
Step 1: Choose containers for your meals
Match container size and shape to the portion and food. Use shallow containers for cooked meals that need to cool quickly, leak-resistant containers for soups and saucy dishes, and separate compartments when you want to keep crisp or dry ingredients apart. Select containers with lids that close firmly and can be cleaned fully.
Check the product label for food contact, freezer, microwave, and dishwasher ratings. If you plan to take meals to work, test that the lids fit securely before filling them.
Tip: Do not assume a lid is leakproof because it snaps on. Turn an empty, closed container gently over a sink to check the seal.
Check: Each meal has a container that fits its portion and storage needs, and the lid closes without gaps.
Step 2: Wash and dry the containers
Wash containers and lids with hot, soapy water, or use a dishwasher if the manufacturer allows it. Pay attention to corners, grooves, and removable seals where food can collect. Rinse away soap and let every piece dry completely before packing.
Tip: Keep lids paired with their containers while drying so you can check the fit before filling.
Check: Containers are clean, dry, odor-free, and free of food residue.
Step 3: Portion food into shallow containers
Wash your hands and use clean utensils to divide cooked food into individual servings. Spread hot food in shallow layers rather than filling one deep container. Keep sauces, dressings, crunchy toppings, and other ingredients that soften or need separate handling in their own containers.
Leave a little room at the top for the lid to close without pressing into the food. For freezer portions, leave extra headspace if the food contains liquid, since it can expand as it freezes.
Tip: Do not pack hot food into a deep, tightly sealed container and leave it on the counter. Portioning helps food cool faster, and prompt refrigeration limits time at room temperature.
Check: Servings are easy to lift out, lids do not touch or crush the food, and liquid has room to expand if frozen.
Step 4: Cool and refrigerate cooked portions
Refrigerate perishable cooked food promptly. Use shallow containers and avoid stacking hot portions tightly together while they cool. Leave space around them at first so cold air can circulate; stack containers once the food is chilled. Keep the refrigerator at 40°F (4°C) or below.
Follow recognized food safety guidance for storage time. Many cooked leftovers should be used within three to four days in the refrigerator. Freeze portions you will not eat in that window rather than keeping them longer.
Tip: Do not wait for a large pot or batch to cool completely on the counter. Divide it into shallow portions and refrigerate promptly.
Check: Perishable portions are refrigerated within the safe time window, and the fridge is cold enough.
Step 5: Label and freeze portions you will save
Write the dish name and packing date on a label. Mark portions for the freezer before placing them inside, and arrange them in a single layer until solid if space allows. Once frozen, stack them so you can find older portions first.
Use freezer-rated containers, and leave headspace for foods that expand. For best quality, use frozen meals within a reasonable period based on the food and storage guidance; freezing keeps food safe while continuously frozen, though quality can decline over time.
Tip: Label before freezing. Condensation and frost can make it harder to mark a container later.
Check: Each stored portion has a readable name and date, and frozen food is in a container rated for freezer use.
Step 6: Reheat and serve safely
Check the container’s microwave rating before reheating. If the lid is not microwave-safe, remove it or vent it as its instructions direct. Stir food partway through heating when practical, then check that the center reaches 165°F (74°C) with a food thermometer. Heat only the portion you plan to eat.
Thaw frozen food in the refrigerator, in cold water, or in the microwave—not on the counter. If you thaw food in the microwave, reheat it promptly. Transfer food to a microwave-safe dish if the storage container is not rated for reheating.
Tip: Glass can become hot, and some containers can crack with sudden temperature changes. Follow the manufacturer’s heating and thawing directions.
Check: The food is hot throughout, reaches 165°F (74°C) when checked, and the container shows no damage or warping.
Step 7: Clean containers after use
Discard food that is spoiled or has been stored beyond the recommended time; do not taste it to decide whether it is safe. Wash containers and lids after each use, clean seals and corners, and dry all parts before putting them away. Store lids where they will not become bent or stretched.
Tip: If a container keeps an odor or stain after washing, check the manufacturer’s care advice and replace it if it is damaged or cannot be cleaned thoroughly.
Check: Used containers are clean and dry, and lids still fit their matching bases.
Common Mistakes to Avoid
- Using a container in the microwave or freezer without checking its rating. — Read the manufacturer’s label or care instructions for each container and lid. Transfer food to a rated dish when the container is not approved for that use.
- Leaving cooked food out until it feels completely cool. — Divide food into shallow portions and refrigerate within two hours, or within one hour when the room is above 90°F (32°C).
- Filling containers to the rim, especially before freezing. — Leave space for lids to close and for liquids to expand as they freeze.
- Forgetting what is in a container or when it was packed. — Label each portion with its dish name and packing date before refrigerating or freezing it.
Troubleshooting
Problem: A lid leaks when you carry the meal.
Solution: Check that the lid and seal are clean, correctly seated, and undamaged. Use a container designed for liquids, keep it upright, and carry it in a secondary bag if needed.
Problem: Food cools slowly in the refrigerator.
Solution: Divide it into smaller, shallow portions and space the containers apart while they chill. Check that the refrigerator is at 40°F (4°C) or below.
Problem: A container cracks or warps during reheating.
Solution: Stop using it for heating. Transfer food to a container rated for the appliance, and follow the product’s limits for temperature changes, heating time, and lid use.
Problem: Frozen portions are hard to identify or stuck together.
Solution: Label food before freezing and freeze portions in a single layer until solid when possible. Store them so labels remain visible and use older portions first.
What Success Looks Like
Your meal prep portions are in clean, intact containers with lids that fit. Refrigerated food is dated and kept at 40°F (4°C) or below, and portions for later are labeled and stored in freezer-rated containers. Hot food was portioned shallowly and refrigerated within the recommended time. Reheated food is hot throughout and reaches 165°F (74°C) when checked.
Next Steps
After each meal, return any remaining perishable food to the refrigerator promptly. Check labels before choosing a portion, use older meals first, and discard food that has been stored too long or shows signs of spoilage. Recheck container seals and care labels when replacing or adding containers to your set.
Frequently Asked Questions
How many meal prep containers do I need?
Start with enough containers for the portions you prepare before washing them again. For five lunches, five single-serving containers plus separate small containers for sauces or toppings may be enough. Add more only if your meal plan or cleaning schedule calls for them.
Are glass or plastic containers better for meal prep?
Either can work when the container is food-safe, intact, and used according to its care label. Glass is heavier and can break; plastic is lighter, but some types may stain or retain odors. Choose based on how you carry, store, and reheat meals.
Can I put hot food straight into the refrigerator?
Divide it into shallow portions and refrigerate promptly rather than leaving it out to cool completely. Avoid placing one large, deep, hot pot in the fridge, since it cools slowly. Leave space around containers so cold air can circulate.
How long can I keep meal prep food in the refrigerator?
Many cooked leftovers should be used within three to four days when refrigerated at 40°F (4°C) or below. Follow food-specific guidance, and freeze portions you will not eat within the recommended period.
Can I reheat food in its storage container?
Only if the container and any lid or seal are rated for microwave use. Follow the manufacturer’s directions, vent or remove the lid as instructed, and transfer food to a microwave-safe dish if the storage container is not approved for heating.