
TL;DR

Get business pricing on your home office setup
- Business-only prices and quantity discounts
- Tax-exempt purchasing
- Multiple users, one account, clear invoices
Routing cables through a sit-stand desk keeps your workspace tidy and safe. Use designated channels, cable clips, and leave slack for adjustments. Proper management extends cable life and boosts productivity.
Nothing kills a clean workspace faster than tangled cords spilling over your desk like an uncontrolled jungle. When you switch between sitting and standing, cables can become a frustrating obstacle. But with a few simple tricks, you can tame that chaos.
This guide walks you through practical steps to route your cables smoothly through your sit-stand desk, making it safer, neater, and more adaptable. Whether you’re upgrading or setting up from scratch, these tips will help you keep everything in place without sacrificing flexibility.
Use grommets for clean, protected cable pass-throughs, especially for frequent adjustments.
Secure cables with clips and sleeves to prevent tangling and wear during height changes.
Leave enough slack—about 6 inches—to allow smooth movement between sitting and standing.
Regularly inspect and maintain your cable setup for safety and longevity.
Combine multiple management methods for a customized, tidy workspace.
How to Route Cables Through a Sit-Stand Desk
A clean setup has to move. Guide cords through protected paths, secure them to the frame, and preserve enough slack for the full sitting-to-standing range—without pinches, pulls, or a jungle beneath the desktop.
Tidy is only the visible benefit.
Unmanaged cords can snag on the frame, pull devices toward the desk edge, or bend repeatedly at connectors. A deliberate route protects equipment while making every height change feel effortless.
Remove trip and snag hazards
Lift loose cords off the floor and keep them away from the desk’s legs, crossbar, motors, and other moving parts.
Reduce strain at weak points
Gentle bends, protected pass-throughs, and secured bundles reduce abrasion, pinching, and stress near connectors.
Make maintenance predictable
Labels and organized routes make it faster to replace a device, troubleshoot a connection, or add another cable.
Build from source to screen.
Map every destination before fixing anything in place. Route the essential cables first, then bundle, secure, add the movement loop, and test the desk across its full range.
Identify
Lay out power, HDMI, USB, Ethernet, audio, and peripheral cables. Check their lengths and destinations.
Choose the route
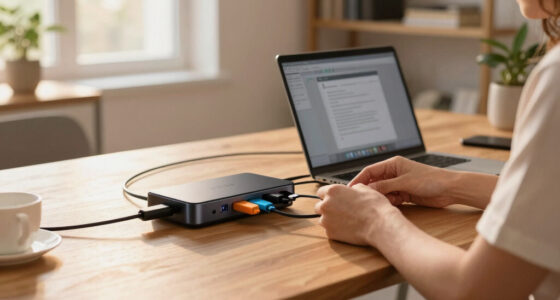
Use built-in grommets and channels first. Add an under-desk tray where adapters and excess cable need support.
Bundle and secure
Group related cords in a sleeve. Fix the bundle to the frame with reusable straps, clips, or adhesive mounts.
Leave slack
Create about six inches of controlled slack near the moving transition. Avoid tight bends and hanging loops.
Slack should move—not swing.
Too little length transfers force to plugs and internal conductors. Too much creates a loop that can snag. The target is a controlled buffer, anchored above and below the moving zone.
Use the right tool for each zone.
No single accessory solves the whole route. Grommets protect transitions, trays carry hardware and excess length, while sleeves and clips control the moving bundle.
| Feature | Built-in grommets | Under-desk trays | Sleeves & clips |
|---|---|---|---|
| Installation | Easy when already built into the desktop | Simple, but may require screws or tools | Very easy and DIY-friendly |
| Flexibility | Limited to fixed entry points | Easy to add adapters and extra cables | Highly adjustable during re-routing |
| Protection | Shields cables from edge abrasion | Supports weight and reduces connector strain | Reduces tangling and surface friction |
| Best location | Desktop pass-through | Power strip and adapter zone | Frame route and moving transition |
| Typical cost | Moderate or included | Moderate to high | Low to moderate |
Before the desk moves.
Unplug the desk before adding trays, drilling, or repositioning power equipment. Once everything is secured, inspect the setup at its lowest and highest positions.
The clean-route chain.
Think of cable management as one connected system. Each stage protects the next, from the wall outlet to the equipment moving with the desktop.
Keep the route healthy after installation.
Why Proper Cable Routing Matters for Sit-Stand Desks
Routing cables correctly isn’t just about aesthetics. It prevents damage, reduces trip hazards, and keeps your workspace flexible. When cables are left unmanaged, they can become a safety risk—tripping over loose cords or accidentally yanking sensitive equipment off the desk. Proper routing ensures that cables stay out of the way during height adjustments, which is crucial because tugging or pinching cables can lead to internal damage or disconnections that disrupt your workflow.
Furthermore, well-managed cables reduce wear and tear, especially at points where cables bend or pass through grommets. This prolongs their lifespan, saving you money and hassle. An organized setup also minimizes distractions, helping you focus better and creating a professional appearance, whether for remote meetings or shared workspaces. Essentially, thoughtful cable management enhances safety, equipment longevity, and overall productivity.
cable management grommets for sit-stand desk
As an affiliate, we earn on qualifying purchases.
As an affiliate, we earn on qualifying purchases.
How to Route Cables Step-by-Step Through Your Sit-Stand Desk
- Identify all cables: Power cords, HDMI, USB, peripherals. Lay them out to see their lengths and destinations. Recognizing each cable’s purpose helps determine the best routing path and avoid unnecessary clutter or strain.
- Choose your route: Use built-in grommets, cable channels, or add aftermarket accessories like cable trays. Selecting the right pathway minimizes bends and tension, which can cause internal damage over time. For example, routing cables through a designated grommet reduces the risk of pinching or abrasion, especially if you frequently move your desk.
- Gather your tools: Cable clips, Velcro straps, cable sleeves, adhesives, and possibly a drill for installing grommets. Having the right tools ready ensures a smooth installation process and helps you secure cables efficiently, preventing accidental disconnections.
- Start from the power source: Bring cables through the designated entry points, avoiding sharp bends that could stress the wires. Proper entry reduces strain on connectors and prolongs cable life.
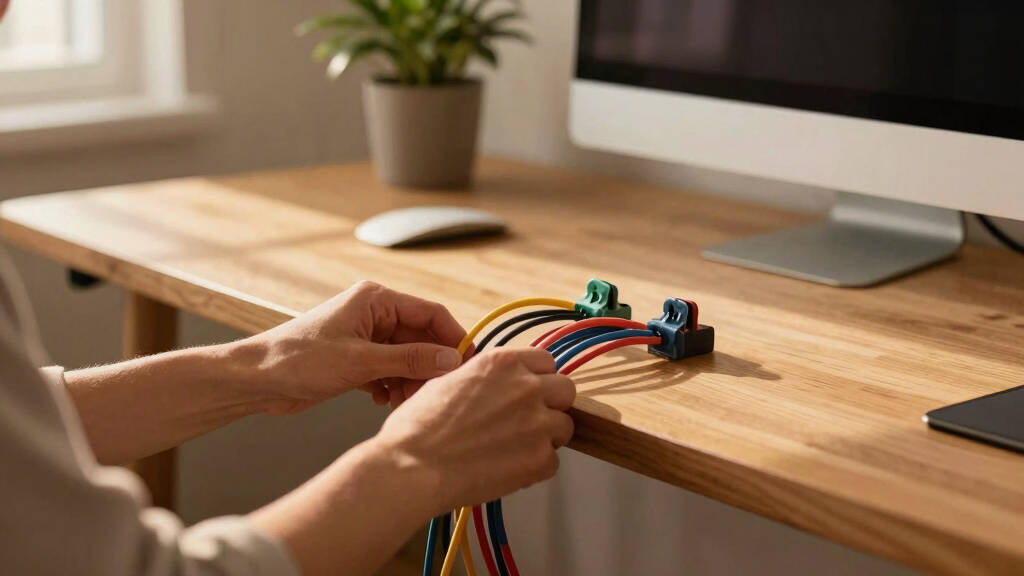
- Bundle and secure: Use cable clips or sleeves to keep cables tidy along the desk frame. Securing cables prevents accidental yanks that can damage connectors or cause disconnections, especially during height adjustments.
- Leave slack: Ensure enough length—about 6 inches—to move between sitting and standing without pulling or stretching cables. This slack acts as a buffer, preventing internal wire damage during frequent position changes. Why leave slack? Because tight cables can lead to internal wire stress and eventual failure, especially when moving the desk up and down repeatedly. Adequate slack provides flexibility and reduces the risk of internal damage, which can be costly and inconvenient to repair.
- Test and adjust: Move your desk up and down, check for strain, and re-route if necessary. Regular testing helps identify weak points or areas where cables may be pinched, allowing for proactive adjustments that extend cable lifespan and maintain safety.
For example, if your desk has a central cable grommet, run the power and data cables through it first, then secure remaining cords along the frame with clips. This keeps everything neat and flexible, enabling you to switch positions smoothly without risking damage or disconnection.
As an affiliate, we earn on qualifying purchases.
Compare Common Cable Management Options for Sit-Stand Desks
| Feature | Built-in Grommets | Under-desk Trays | Cable Sleeves & Clips |
|---|---|---|---|
| Ease of Installation | High, during initial setup | Simple, with some tools | Very easy, DIY friendly |
| Flexibility | Limited to designated points | High, can add/remove cables | Very high, adjustable as needed |
| Protection | Protects cables from pinching and abrasion | Protects cables from damage and strain | Prevents tangling, reduces wear and tear |
| Cost | Moderate, included with many desks | Variable, moderate to high | Low to moderate |
Choosing the right option depends on your desk’s design and your specific needs. Combining methods—such as using grommets for main pass-throughs and clips for additional securing—can provide a comprehensive solution, balancing ease of installation, flexibility, and protection for your cables.
adjustable sit-stand desk cable organizer
As an affiliate, we earn on qualifying purchases.
As an affiliate, we earn on qualifying purchases.
Top Tips to Keep Cables Safe and Neat
- Use cable clips or adhesive mounts to secure cables along the edges of the desk or frame. Properly anchoring cables prevents accidental yanks, which can damage connectors or cause disconnections, especially during height adjustments.
- Opt for flexible cable sleeves or spiral wraps to bundle multiple cords together. This not only reduces visual clutter but also minimizes the risk of internal wire damage caused by friction or bending stresses.
- Leave slack—about 6 inches—so you can adjust height without pulling on the cables. Adequate slack acts as a buffer, preventing internal wire stress during frequent position changes.
- Regularly inspect for wear or damage, especially after moving the desk or re-routing cables. Early detection of frayed or damaged cables prevents potential safety hazards and extends their lifespan.
- Label cables with tape or color coding to simplify troubleshooting or re-routing later. Clear labeling saves time and reduces the risk of unplugging the wrong device during maintenance or adjustments.
Imagine pulling your desk from sitting to standing and knowing your cables won’t yank, tangle, or wear prematurely. Taking these steps ensures a safer, longer-lasting setup that adapts seamlessly to your workflow and movement.
As an affiliate, we earn on qualifying purchases.
Safety Tips for a Smooth and Secure Cable Setup
Always unplug your desk before installing new cable management features. Use tools carefully—especially if drilling or attaching adhesives. Avoid overloading power strips, which can cause overheating or fire hazards.
Check that no cables are pinched or stretched tightly. Keep cords away from moving parts of the desk to prevent accidental disconnection or damage. Regularly review your cable setup to ensure everything remains secure and safe.
“A well-routed cable system isn’t just tidy—it’s a safety feature that keeps your workspace reliable and hazard-free.”
Frequently Asked Questions
How do I prevent cables from tangling when moving my sit-stand desk?
Bundle cables with spiral wraps or Velcro straps, and secure them along the desk frame with clips. Leave enough slack—about 6 inches—so movement doesn’t pull or strain cords. Regularly checking and adjusting your setup keeps everything smooth.
Can I add cable management to an existing desk?
Absolutely. Aftermarket accessories like grommets, cable trays, and clips are easy to install. Just unplug your cables, follow the instructions for your chosen accessories, and re-route with care. It’s a simple upgrade that makes a big difference.
What safety precautions should I follow when installing cable management accessories?
Always unplug your desk before starting. Use appropriate tools—like drills for grommets—and follow safety guidelines. Avoid overloading outlets and keep cables away from moving parts. Regularly review your setup for signs of wear or loose connections.
How much slack should I leave for adjusting my desk height?
Leave about 6 inches of extra cable length. This provides enough room for smooth height changes without tension or pulling. Adjust as needed based on your desk’s range of motion and cable types.
Are wireless devices worth using to reduce cable clutter?
Yes. Wireless peripherals like keyboards, mice, and chargers cut down on cable mess. They also make adjusting your desk easier, since fewer cords get in the way. Just ensure your wireless setup has reliable connectivity.
Conclusion
Routing cables through your sit-stand desk isn’t just about looks—it’s about creating a safe, flexible workspace that adapts to your needs. A little effort upfront pays off in smoother adjustments and fewer headaches down the line.
Think of your desk as a living part of your workspace. When cables are managed well, it’s like giving that living workspace a gentle, organized heartbeat—calm, reliable, and ready for action.
Fall Picks
fall essentials
As an affiliate, we earn on qualifying purchases.



![[Fact Check] Lee’s Claim Blaming Oh For Seoul Home Prices? - 최보식의언론](https://timerik.com/wp-content/uploads/2026/09/fact-check-lee-s-claim-blaming-oh-for-seoul-home-prices-featured-260x140.jpg)